Why is the Base of My Toilet Leaking?
Posted on August 19, 2025 by Melbourne Plumber
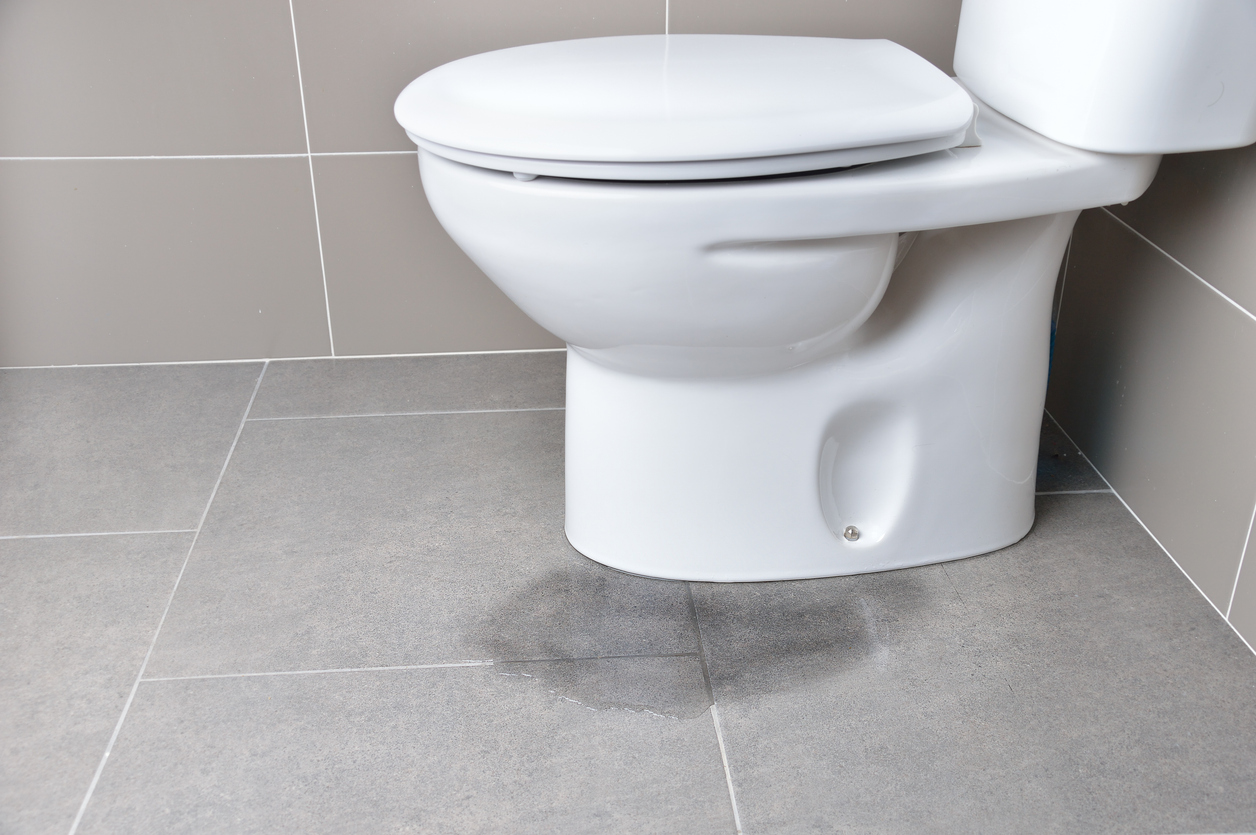
One day you wake up, use the bathroom and realize there is water seeping from the bottom of your toilet. You may then think to yourself “this is going to be an expensive fix.”. But I have good news for you. It most likely won’t be expensive at all.
When it comes to water seeping out from the bottom of your toilet, near the base, it really comes down to a few things it could be.
Water Coming from Elsewhere
There is a chance that the water pipe connecting to your toilet is leaking and the water is just pooling around the base of the toilet. Make sure to check the valves and pipes by hand to see if they are wet.
If they are leaking, then you may need to replace them or at the very least patch the leak.
Check the bathroom sink pipes to see if they are leaking as well. Sometimes they will leak, and the water slowly makes it way toward the toilet.
Tee Bolts are Loose
These are the bolts which hold your toilet to the ground. They help create a seal and hold the fixture in place, so it doesn’t move or waddle.
Fixing this problem is as simple as just tightening these bolts. They are usually camouflaged under some plastic flaps that you need to pop or pull off.
Make sure they are good and tight but don’t overdo it. You don’t want to strip the bolts or crack the porcelain.
Wax Ring Needs Replacing
There is a wax ring that helps secure the connection between your toilet and the pipe that leads directly to the sewer. This wax ring can degrade or become damaged over time.
Your plumber may use a few different tests to see if this is indeed causing the issue. If the wax ring looks old, he may replace it anyway to prevent problems down the road.
This is a job you can do yourself if you feel so inclined. Here are the instructions.
How to Replace the Wax Ring
Tools and Materials Needed:
- Replacement wax ring (with or without a rubber gasket, depending on your toilet)
- Adjustable wrench or socket wrench
- Putty knife or scraper
- Screwdriver
- Rubber gloves
- Towels or rags
- Bucket
- Cleaning solution (e.g., disinfectant or bleach)
- Optional: new toilet bolts, plumber’s tape
Instructions:
- Turn Off the Water Supply:
- Locate the shut-off valve behind the toilet and turn it clockwise to stop water flow.
- Flush the toilet to empty the tank and bowl. Use a sponge or towel to remove any remaining water in the bowl.
- Disconnect the Water Line:
- Use an adjustable wrench to disconnect the water supply line from the bottom of the toilet tank. Place a towel or bucket under the connection to catch any water.
- Remove the Toilet:
- Remove the bolt caps at the base of the toilet (if present) to access the closet bolts.
- Use a wrench to loosen and remove the nuts from the closet bolts securing the toilet to the floor.
- Gently rock the toilet side to side to break the wax seal, then lift it off the floor and place it on a towel or old blanket nearby.
- Remove the Old Wax Ring:
- Wear gloves and use a putty knife or scraper to remove the old wax ring from the toilet flange (the pipe fitting in the floor) and the bottom of the toilet.
- Clean the flange and the base of the toilet thoroughly with a disinfectant to remove any residue or debris.
- Inspect and Prepare the Flange:
- Check the toilet flange for cracks or damage. If it’s damaged, you may need to replace it (consult a plumber if unsure).
- If the flange is in good condition, ensure it’s clean and dry.
- Install the New Wax Ring:
- Place the new wax ring onto the flange, ensuring the rubber or plastic sleeve (if included) faces down into the drainpipe. Press it firmly to secure it.
- Alternatively, you can attach the wax ring to the bottom of the toilet (around the outlet) if that’s easier.
- Reinstall the Toilet:
- If the old closet bolts are rusted or damaged, replace them with new ones. Insert the bolts into the flange slots and secure them with washers and nuts.
- Carefully lower the toilet onto the flange, aligning the bolts with the holes in the toilet base. Press down firmly to compress the wax ring and create a seal.
- Tighten the nuts on the closet bolts, alternating sides to ensure even pressure. Do not overtighten, as this can crack the porcelain.
- Reconnect the Water Line:
- Reattach the water supply line to the tank, ensuring a snug connection. Use plumber’s tape on the threads if needed.
- Turn the water supply back on by opening the shut-off valve.
- Test for Leaks:
- Flush the toilet several times and check for leaks at the base or water line connections.
- If no leaks appear, install new bolt caps (if provided) over the closet bolts.
- Clean Up:
- Wipe down the toilet and surrounding area with a disinfectant.
- Dispose of the old wax ring and any debris properly.
Tips:
- If the toilet wobbles after installation, you may need to shim it with plastic shims or tighten the bolts slightly.
- If leaks persist, the wax ring may not be seated properly, or the flange may need repair.
- Work in a well-ventilated area, as the process can be messy and odorous.
This should take about 1–2 hours, depending on your experience. If you encounter issues like a damaged flange or persistent leaks, consider consulting a professional plumber.